Why take the trouble?
Part of the pleasure of owning a 260 lies in its high standard of equipment, especially in SE form: our passengers too can enjoy the many “creature comforts” our cars are furnished with. Dig a little deeper though and it soon becomes apparent that many features and fittings which were provided in early Rover 75s were relegated to the accessories list or simply cut during Project Drive, MG Rover’s cost-cutting exercise. Retrofitting these items, however, is often a straightforward job as the wiring or installation points have been left in place and your car’s appearance will remain completely original.
Indeed often the most difficult job today is to track down the different parts as they have become officially NLA (no longer available). Looking through my files I can see invoices from MG Rover suppliers in the UK and the Netherlands, members and vendors on the Two-Sixties Forum and the Rover 75 and ZT Owners’ Club Forum, as well as internet auction sites and even a Mini specialist from the Lake District! XPart’s MG Rover Partfinder service has also been a great help in locating some items within their dealer network.
Succeeding in doing this, however, offers the satisfaction of bringing our cars up to 2011 standards: in fully equipped form the ZT 260 still compares well with the German premium marques before an expensive visit to the options list! For long-term 260 owners like myself regularly finding and adding some of these small accessories is a great way to sustain our interest in our cars. And if you choose not to fit the parts yourself your garage won’t complain!
Showing the changes
In the rest of this blog I will illustrate the changes I have made to my car. I still have a couple of jobs waiting to be done: the centre cubby torch and auxiliary power socket, and the ski bag from the boot into the rear seat. I hope you will find these modifications interesting and will be encouraged to do the same on your car or share details of other changes you have made.
The first changes are all bolt (or even stick)-ons, with no wiring or mechanical work required:
- Seat belt anchorage bolt covers: easy peasy, simply press and fix in place
- Driver’s grab handle: another easy job to fit, just remove the existing blanking covers and fit the new handle with two screws
- Door edge reflectors: peel off the old and stick on the new! These more substantial reflectors are also used by Land Rover and can be sourced that way, as is the case for some other parts (e.g. the side indicator repeaters)
- Fire extinguisher and mount: this was a lucky find whilst visiting a classic car show in the Netherlands. The mount bolts in place under the front passenger seat and takes a standard 1 kg extinguisher, although I was able to find a Rover-branded extinguisher which was still fully pressurized
-
Leather cover for front centre armrest: a little fiddly to fit, but very satisfying once completed
-
Rear ashtray: just clips in place of the existing plastic moulding
-
Rear sunblind: I went for a manual blind, which requires cutting into the standard rear parcel shelf, but takes less work to fit (and is much less expensive) than the electrically operated version
-
Boot-mounted hazard warning triangle: again an easy fit, as the holes for the fixing screws are ready and waiting in the boot lid panel under the covering trim
-
Reversible screwdriver and wheel centre cap removal tool: these are missing from the 260 saloon toolkit (I believe the ZT-T did get the screwdriver), but the spaces are ready in the foam moulding
-
Mobil 1 stickers for rear quarter light and engine compartment, as fitted in Longbridge: OK, a bit anoraky this one, I admit!
Next up, a couple of items which require electrical work to install:
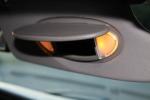
Illuminated sun visors: again the wiring may already be present, curled up at the base of the windscreen pillar trim
Powerfold mirrors with door panel switch: again the wiring may well already be in place within the doors, which makes connecting these a bit easier
5-hole switch panel in the centre console: I needed to fit a fifth switch to activate the voice control function for my Bluetooth phone kit, but 5-hole switch panels in Technical Grey are pretty much impossible to find. Nick Bothrone at Austin Garages was able to cut a fifth hole into my existing 4-hole panel, following the outline already there on the rear of the switch panel
Powerfold mirror switch panel
Illuminated sun visor
And finally, two jobs which take a bit more effort in the workshop:
Twin-tone horn: this one is an exception to my introductory comments, as fitting the new horn is a “bumper-off” job. Roger Parker has described this very fully in his earlier blog here
Fan resistor: again Nick at Austin Garages fitted this upgrade during a routine service with the front bumper off already (to access the air filter)
If you are interested in finding out more about the different changes made during Project Drive there is a lot of information available on the Rover 75 and ZT Owners’ Club Forum.


steve livesley
May 31, 2021
Some great ideas – hope you don’t mind me reblogging this on my blog at http://www.mgzt.info